Have you ever marveled at the intricate geometry of cathedral windows or the mesmerizing patterns in Islamic art and architecture? The detailed repetition and complexity of these designs are truly a spectacle.
Historically, crafting such elaborate patterns was a daunting task. Today, however, laser cutting technology lets you replicate that artistic complexity with ease.
With precise digital design, a laser cutting machine brings your vision to life; you can create layered 3D artwork that elevates any interior space. Are you intrigued by the prospect of crafting such unique pieces?

This article is designed for you. It takes you to the world of laser cut art and its creative making process. It also contains 10 laser cut art projects to spark your imagination. These examples will guide you in crafting your own breathtaking art pieces.
In This Article
- What Is Laser Cut Art?
- Materials Used in Laser Cut Art
- 10 Popular Laser Cutting Art Projects
- Best Laser Cutters for Laser Cut Art Creation
- How to Create A Layered Laser Cut Art?
- Conclusion
What Is Laser Cut Art?
Laser cut art is a modern form of creativity where artists use laser cutters to transform materials like wood, acrylic, paper, or metal into intricate designs. With precise laser technology, designers can produce intricate patterns and shapes that would be nearly impossible to achieve by hand.
Digital design is the key factor in making laser cut art. It’s where the magic happens. With design software, artists make complex layered designs, or maybe a 3D model to virtually see how the artwork may look. Within software, they can tweak and refine their ideas before bringing them to life.
This digital approach also offers a level of repeatability. Once a design is perfected in the software, it can be recreated again and again with a laser cutting machine – each time with the same precision and detail. This consistency is crucial, especially for those who produce multiple pieces or work on large-scale projects.
Materials Used in Laser Cut Art
The beauty of laser cutting lies in its remarkable adaptability to a diverse array of materials. The most frequently utilized materials for laser cutter art are:
Wood
Wood is a popular choice for laser cut art due to its natural beauty and versatility. It's available in various types, each with its characteristics. For instance, balsa wood is great for delicate, intricate designs due to its softness. Common projects with wood include decorative panels, 3D layered wall art, and personalized signs.
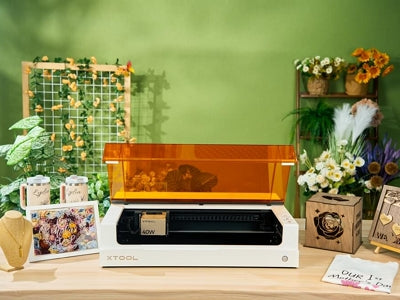
xTool S1 Enclosed Diode Laser Cutter

Acrylic

Acrylic is available in both clear and opaque colors. It is a favorite for projects where color and light play a significant role. Particularly effective for illuminated art pieces, such as backlit signs or modern lamp designs.
xTool P2 55W CO2 Laser Cutter

Metal

Metal is often used in industrial applications. For instance, we see its laser cut designs in outdoor installations (doors, windows, etc.), business logos, and bespoke furniture pieces.
Paper
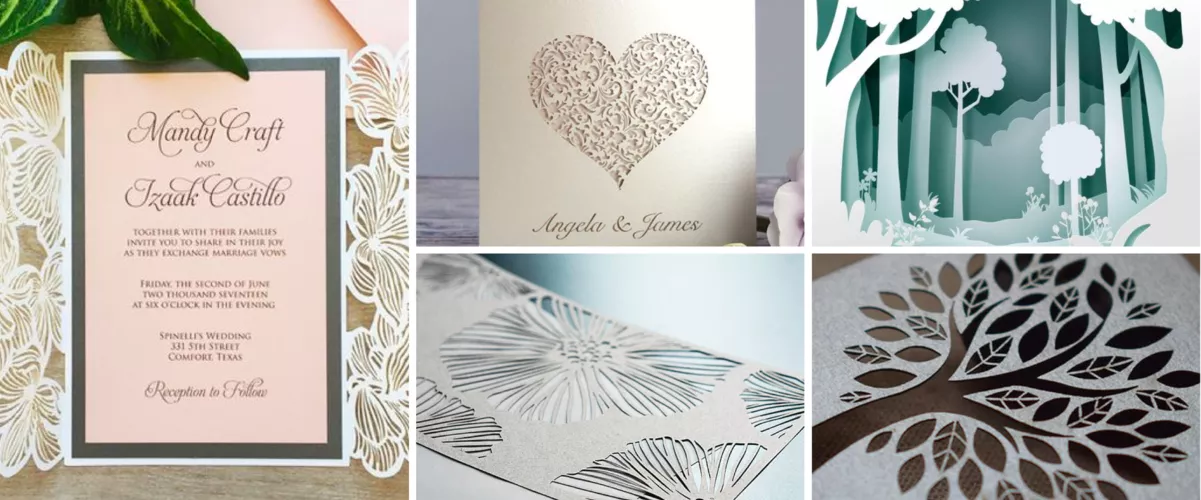
Paper is ideal for projects that require fine, detailed work. It is commonly used for creating festive cards and wedding invitations. Laser cut paper art can range from delicate, layered pieces to bold, geometric designs.
10 Popular Laser Cutting Art Projects
Want to see how these materials transform into stunning art pieces? We have compiled a list of the top 10 laser cutting art projects made by xTool users.
1. Wooden Mandala Wall Art

8 Layer Mandela, made with xTool P2
This Wooden Mandala Wall Art is a stunning example of laser cut wall art. Mandala is a spiritual and ritual symbol in various cultures and forms an exceptional interior piece. It has been crafted by a beginner user with xTool P2 on birch Plywood, known for its smooth surface and fine grain.
The mandala spans 12" x 12" and is composed of eight layers, which add depth and dimension to the design. The layers are cut and then stained. The top layer features Brilliant Blue acrylic paint, which gives the whole art piece a vibrant finish.
2. Divided and Layered Bamboo Wall Art

This Layered Bamboo Wall Art is a captivating piece designed to fill the space between two doors. Another example of how versatile laser cut wall art can be. This wall art is crafted with xTool M1 from 3mm basswood. The choice is significant as it’s not only lightweight but also lends itself well to detailed laser cutting and painting.
A unique aspect of this artwork is the addition of a separation layer between the outer frame and the internal design. This innovative approach adds an extra dimension to the piece, creating a sense of depth and complexity. The layered design, combined with the contrasting black paint, creates an eye-catching 3D effect that draws the viewer in.
3. Laser Cut Map

This Laser Cut Map is an exquisite piece of layered laser cut art that exemplifies the capabilities of laser cutting in creating geographic representations. The design includes a bathymetric map, which illustrates underwater topography, crafted with precision and artistic flair.
Constructed from 5mm birch plywood, the map is layered to depict the varying depths and contours of the underwater landscape. It’s then hand-painted with acrylic paints and sealed with a satin spray. The paints give it a more vibrant look and enhance the details, made through laser cutting.
4. Framed 3D Layered Animal Wall Art

This 3D Layered Animal Wall Art is a striking piece that combines modern laser cutting techniques with traditional artistic themes. It features a tribal cat design, which is made up of two layers of MDF (Medium Density Fiberboard).
Each layer was intricately laser cut, then painted, and mounted in a black frame. The framing not only protects the artwork but also adds an extra dimension, giving it a more pronounced 3D effect.
5. Vintage Musical Notes Wall Art

This artwork captures the essence of vintage music and transforms it into a visually appealing wall art piece. The design features musical notes and symbols, intricately cut into the wood and acrylic. This artwork can add a touch of nostalgia and elegance to any room.
6. Cross Art with LED lighting

This is an advanced and innovative project in which laser cutting is combined with LED lighting technology to create a visually stunning and illuminated piece. It is particularly unique due to its integration of electronics, which require some soldering skills to assemble the LED lighting components.
The artwork is primarily constructed from semi-transparent acrylic sheets, walnut plywood, and MDF. The centerpiece of the design is a cross, with several acrylic decorative faces. They create a mesmerizing stained glass effect. The cross is lit from the inside with LEDs, which gives it a radiant and ethereal glow.
7. Laser Cut Nursery Sign

Need a heartwarming and personalized gift for your child? A laser cut nursery sign is a great option. The nursery sign features the styled name of the child, which itself adds a personal and intimate touch to the piece.
It's created with Maple wood using xTool D1 Pro. The combination of the natural beauty of the maple wood with the precise laser cut details creates a charming and elegant sign that is perfect for a nursery setting.
8. Wall Clock

This unique wall clock is a blend of gothic and floral themes. It is a perfect example of how everyday objects like clocks can be transformed into art pieces with laser cutting. Black acrylic is used for making the base of the clock. It gives the clock a bold and dramatic look, making it a standout piece in any room. You may recreate your own custom-designed clock, following the same method.
9. Laser Cut Invitations

If you to create stylized invites for your birthday parties, weddings, or festive parties, then laser cutting is the best option for creating customized designs. This particular laser cut invitation was crafted for a Quinceañera celebration, a significant event in many cultures. It marks the transition of a girl into womanhood on her 15th birthday.
The cardstock was intricately etched on lower power settings to avoid its cutting. Plus, small signs for flower bouquets and the number ‘15’ were created using 1/4 inch plywood. You may tweak designs and recreate such exciting laser-cut invitations.
10. Masquerade Mask

This masquerade mask showcases how festive costume accessories can be made with laser cutting. This particular mask was designed for Halloween to add an element of mystery and intrigue to the costume. It is made using xTool P2, by laser cutting cardstock. You may see how the intricate patterns are precisely carved out of the cardstock. That’s evidence of how accurate laser cutting results are.
Best Laser Cutters for Laser Cut Art Creation
Did any of these projects excite you? Want to craft your laser cut art? Well, we have some specific machine recommendations for you.
xTool S1

Meet the xTool S1, the next generation of the xTool D1 Pro. It is the world’s most powerful closed diode laser cutter, which blends high power with top-notch safety features. Its enclosed design, complete with laser filtering, and a five-direction fire safety system, make it a standout in safety. Certified as a Class 1 laser product by IEC, it’s designed for peace of mind.
The S1’s eight 5.5W lasers combine for an impressive 40W of optical power, which is perfect for cutting a variety of materials like wood, cardboard, and acrylic. It can slice through 18mm wood in a single pass, speeding up those layered designs. Plus, with an engraving speed of up to 600mm/s, it’s not just powerful, it’s fast too.
The workspace is generous at 498*319 mm. This size is enough for most woodworking projects. Need more space? The automatic pass-through slot lets you work with sheets up to 3000mm long.
But that’s not all. The S1 introduces groundbreaking technology. It has intelligent algorithms for precise coordinate layout; it displays the laser module's position in real time in the software. And with very precise automated auto-focus, your projects are always sharp and accurate.
The smart air assist feature is the cherry on top. It keeps your lens clean and prevents burnt marks, which are a common sight in wood laser cutting.
xTool P2
xTool P2 is one of the most powerful CO2 laser cutter on the market. It comes with an optical power of 55W, which is capable enough to cut through a range of materials – work with all materials you need for laser cut art are compatible.
One of the key advantages of the CO2 laser is its superior absorption rate in materials like wood and acrylic, compared to diode lasers. This means the same power level can achieve greater cutting depth and faster processing speeds. Impressively, it can cut through 18mm black walnut and 20mm acrylic in just one pass.
The machine’s internal workspace is generously sized at 26 x 14 inches, larger than many other CO2 lasers available. But the xTool P2 doesn’t stop there – it features an automatic passthrough that allows for working on even larger projects, up to 118 inches in length.
Inside, the machine has a dual camera setup. The close-range camera syncs with the laser head, providing auto-focus and extreme precision. The second camera offers a complete preview of the workspace on the laser control software, which lets you drag and drop designs onto the workpiece.
In terms of safety, the xTool P2 mirrors the S1 with a fully enclosed design, including a laser filtering lid. It also features an emergency button and supports a fire safety kit.
How to Create A Layered Laser Cut Art?
Creating layered laser cut art is possible even for beginners, thanks to xTool laser cutting machines. However, you need to have some familiarity with design software and a keen eye for detail.
Here’s a simplified procedure for making layered laser cut art:
Step 1: Design Preparation

The journey starts with a digital design. The key is to break down a complex design into distinct layers. Each layer should fit seamlessly into the overall design, like pieces of a puzzle. Either you take complex design as a whole and break it down or design layers one by one.
For those who are not proficient in graphic design, there’s no need to worry. You can find multiple ready-made laser cut designs online. Websites like Etsy offer digital designs for sale, providing a great alternative for beginners or those looking for inspiration.
Step 2: Prepare the Material for Laser Cutting
Next, you need a material to cut and make these craft pieces. Typically, you will need thin pieces, around 3mm thick, cut to the size required by your design. Materials can vary, but wood is a popular choice for its natural aesthetic.
If you opt for wood, be mindful that it can get burnt marks during the laser cutting process. To mitigate this, you can apply paper masking tape to the surface and use an air assist feature while laser cutting. However, if you plan to paint the wood afterward, minor burns or discoloration may not be a significant issue, as the paint will cover them.
Step 3: Begin the Cutting

Once your design and materials are ready, start the cutting process. Carefully place each piece in the laser cutter, and cut it according to the design. It is important to do this one piece at a time to ensure precision.
Step 4: Post Cutting (Cleaning and Painting)

After the cutting is complete, the next step is cleaning and painting. If you use paper masking on wood to prevent burn marks, this is the time to remove it. Peeling off the masking reveals the clean, and unburnt surface underneath.
Want to stylize the artwork with paint? Do it now, before assembling. With this approach, you can paint with control, covering all corners and edges. You also get to color the intricate designs on layers individually, which isn’t possible for the artwork as a whole.
Step 5: Gluing

The final step is joining the layers and giving them a 3D look. Gluing is a common method to assemble layers. Choose a glue that is suitable for your material. For instance, wood glue for wooden pieces or a strong adhesive for acrylic.
If your design allows, or if you are working with heavier materials, using screws or other fasteners can be a good choice. Besides joining, the fasteners add an industrial or decorative element to the piece.
Conclusion
Laser technology has revolutionized handcrafted art. Intricate décor pieces, once challenging to make, are now easily achievable with lasers. Our list of 10 xTool projects showcases how laser cut art elevates interiors.
Interested in replicating these? Get an xTool laser cutter and share your unique laser cut art with us.
Related Articles
How to Make Prints of Your Art?
10 Unique Mother’s Day Gift Ideas